I’m using a vintage Native Instruments Traktor Kontrol X1 MIDI controller intended for DJs as one of my Cubase MIDI Remote controllers. This type of setup can also be done with quite a few other vintage DJ controllers by NI.
Context
Having more hardware knobs, buttons, faders and other hardware controls continues to fascinate many music makers for a variety of reasons. One of the best understood is live performance.
While I haven’t been performing live for a number of years – I’m still drawn to using hardware because:
- MIDI messages as commands to Cubase work even when Cubase is not the foreground application – this is a significant advantage for my way of working.
- More potential for motor/muscle memory
- The “feeling” of working in a “real” studio
- Makes the studio look a lot more cool to visitors
As a result I’ve been experimenting with different MIDI hardware controllers and Cubase for a number of years. Currently my studio desk is populated by 4 different MIDI controllers by Native Instruments:
- Komplete Kontrol S61 MK2 as the main all-purpose keyboard controller
- Maschine MK3 as the main drum pad
- Maschine Jam as a kind of a mixing console controlling Cubase
- Traktor Kontrol X1 MK1 as a kind of Cubase control room and DAW command center
The first 3 probably aren’t surprising, but the Traktor Kontrol X1 is typically used by DJ’s with DJ specialist software by Native Instruments. But some of the older NI hardware was definitely designed with MIDI enthusiasts like me in mind. Much of the more modern NI hardware arguably isn’t quite as enthusiast friendly and concentrates more on being better with NI’s own ecosystem.
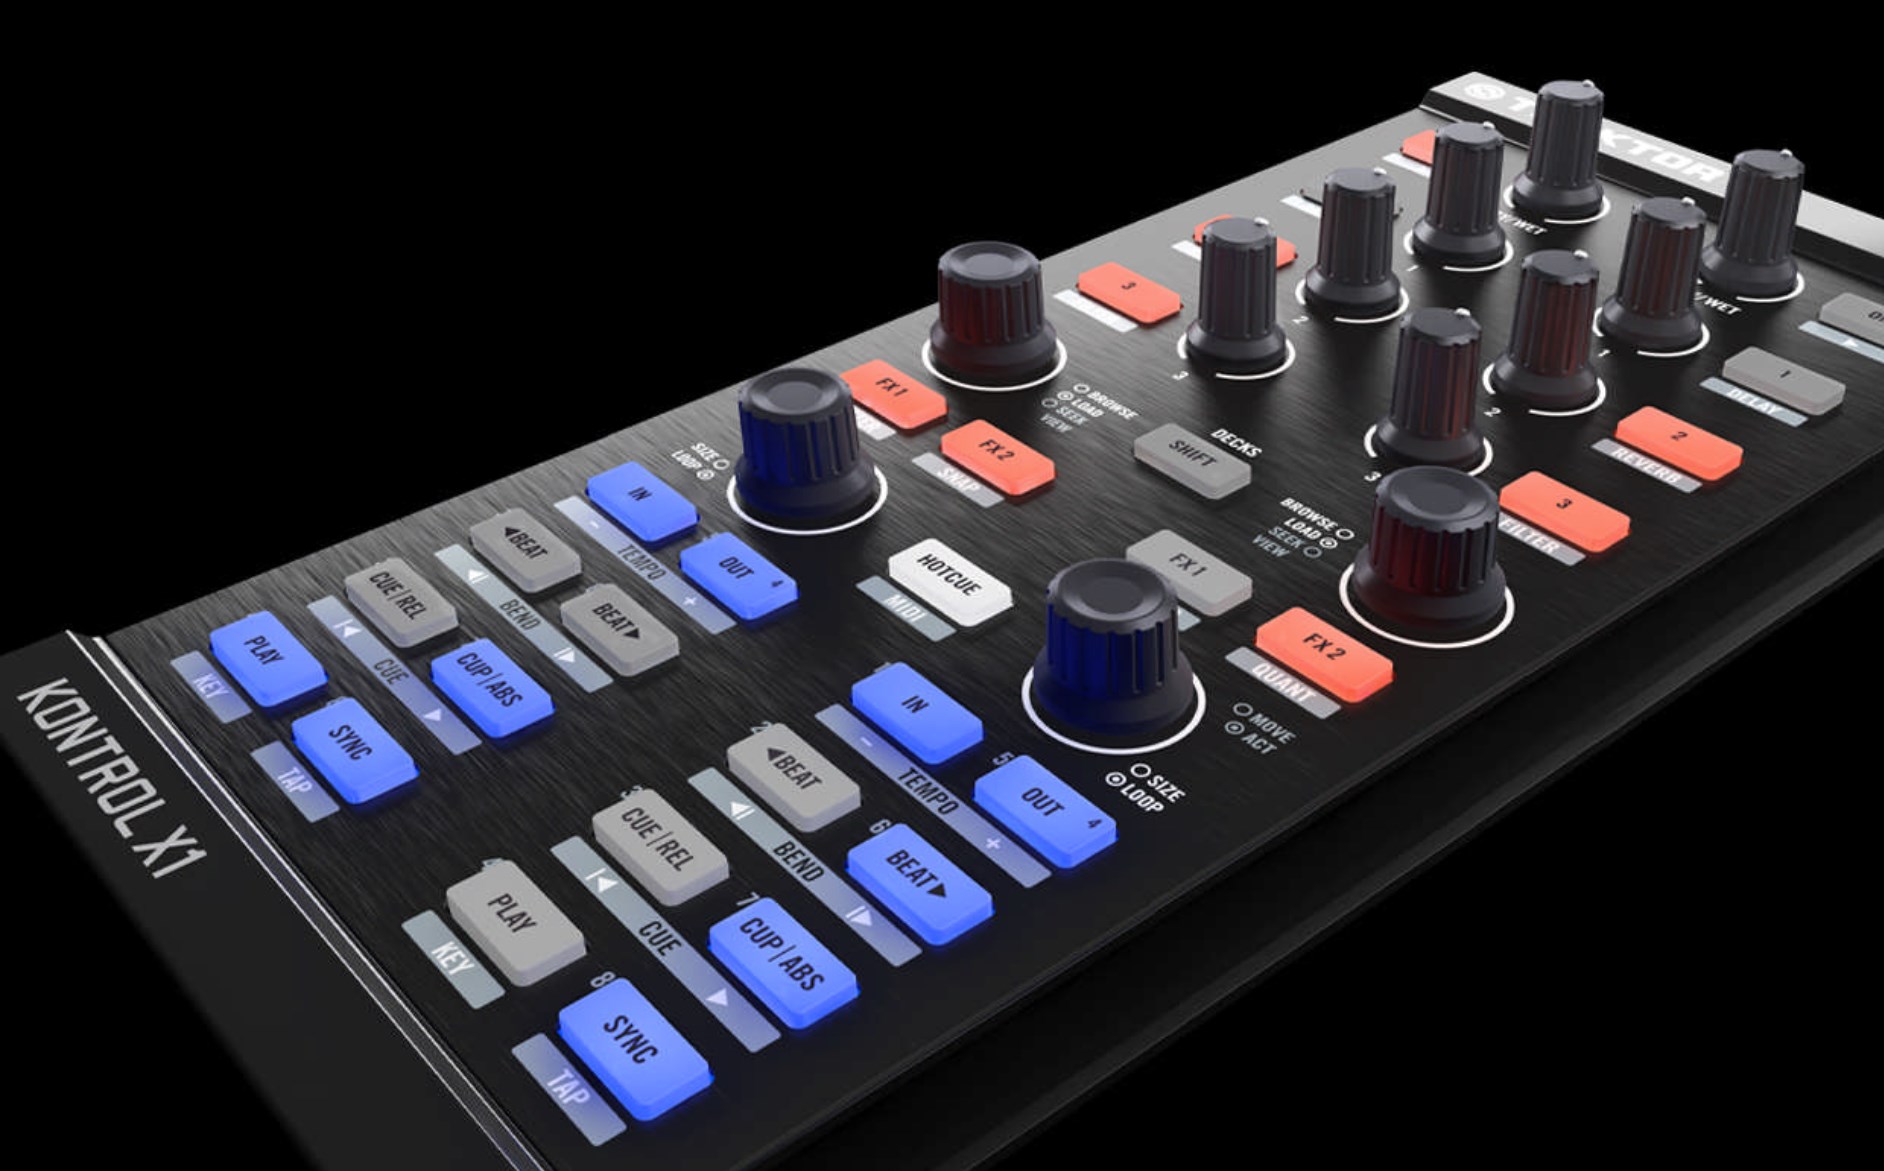
Native Instruments Traktor Kontrol X1 MK1 and Cubase
The older MK1 is obviously more affordable these days, because many X1 users have upgraded to MK2 or MK3 units. I also prefer the MK1 slightly over the MK2 because it has 4 endless rotary click encoders (compared to the 3 on the MK2) and those click encoders are their secret weapon – not only for using with NI’s own DJ software, but also for my use with Cubase.
Caveat: The X1 MK1 probably does not work with Apple Silicon Macs. However the MK2 should work.
I’m using Windows as my current main DAW environment and the MK1 works well with my Win10 system on modern hardware.
However I’m not sure, if it would work with the current MK3, since that appears to use different configuration software.
The secret weapon: Click encoders

Generally, most of the Native Instruments controllers allow the choices of many types of MIDI messages. But most other knobs on NI controllers and other manufacturers I’ve tried, don’t do this one thing:
The click encoders can send a “Relative” MIDI Note message. In practical terms, for example, it can send a MIDI Note 0 (C-2) for each click turning left and MIDI Note 1 (C#-2) for each click turning right.
And that is important, because you can do different things in the Cubase MIDI remote when using MIDI Note messages rather then MIDI CC messages. In my current configuration, I’m using the 4 click encoders for the following Cubase functions:
- Horizontal Zoom in/out
- Select previous/next Track
- Transport nudge reverse/forward (the step size of the nudge depends on the Zoom level)
- Transport nudge back/forward by 4 nudges (with the help of a Cubase macro)
Of course I could do all of those things with keyboard and mouse, but some key commands do different things, depending on the currently active window (even within Cubase)For example, when the Media window in the right Cubase Zone is looking at loops, the arrow keys navigate in that window. But X1 encoder still lets me change tracks, even when the arrow keys on the regular computer keys are otherwise occupied.
And the muscle memory effect is really nice.
Those click encoders also have a push down function which I”m using for things that I often do right after turning the encoder – or instead of turning the encoder. For example,
- For the Zoom encoder, the push resets my Zoom level to my default
- For the Track selecting encoder, the push disables or enables the track (I use other backlit LED buttons for channel edit and instrument edit)
- For the Transport encoder, the push starts playback at the current project cursor location
The regular knobs
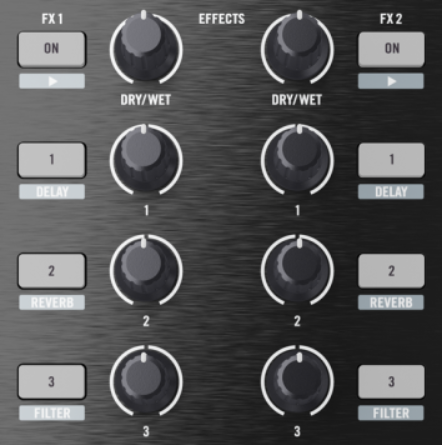
I mostly hesitate to use regular knobs for anything that affects my mix. That’s because I’m always worried about making accidental changes. But I’m less worried about things that affect the Cubase Control Room (present in Cubase Pro). And here I’m using another useful feature generally available on NI controller knobs: A range minimum and maximum and on the X1 controllers, there’s a click right in the middle of the range.
- Monitor volume – using range 28-127, which puts the middle click on the knob at the 0 dB level – very handy for returning to one’s default volume.
- Metronome click volume – using range 72 to 127, this range puts the click at my preferred click volume level.
The backlit LED buttons
I have these programmed to do a variety of different things, including
- transport controls,
- pre- and post-roll activation,
- go to previous marker and next marker
- mute, solo, reset all solo’s
- return to stop mode, start mode
- show and hide the left, extended left, right and bottom zones
The X1 Shift key effectively adds a 2nd page of controls
I’m using that second page more sparingly, since one has to hold down the shift key to enable that second page.
However, I could also make additional pages via the Cubase MIDI Remote, and may just do that in the future.
Programming the X1
Configuring the MIDI messages being sent by the X1 is done via the Native Instruments Controller Editor. For those not using the Native Access application (link in the downloads section below).
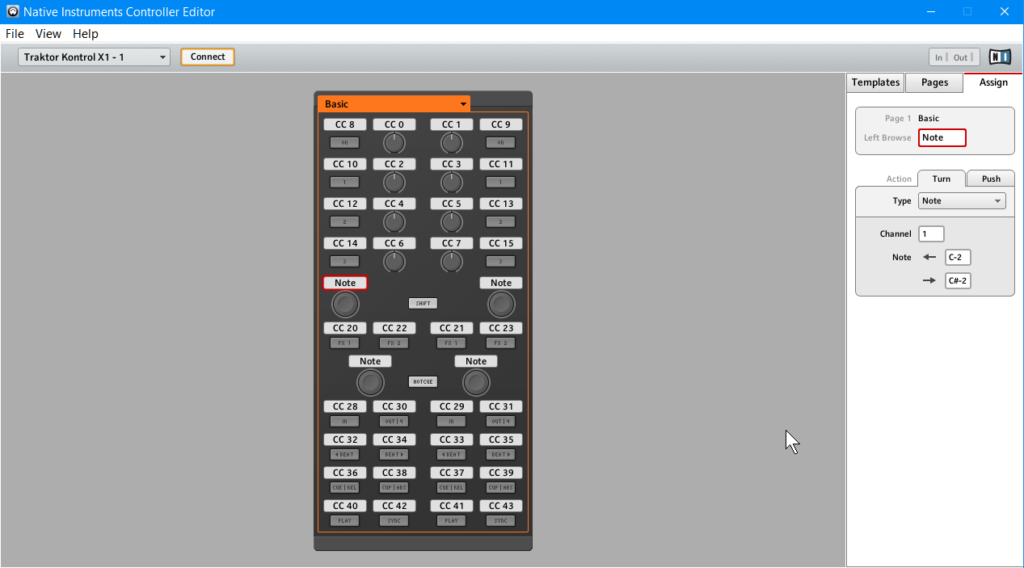
One of the very cool things about that editor is, that one can not only custom configure the desired settings for the X1, but also import and export templates. So I’ve exported my current template for Cubase control added it to the ZIP near the bottom of this post, if any reader wants to see how I’m using the X1 with Cubase. And of course, once imported anyone can freely customize away, whatever their own preferences are.
Programming the Cubase MIDI Remote
There are plenty of tutorials about that already. For example, Jef Gibbons made an excellent video about how to to configure another NI controller, but the part about configuring the Cubase MIDI Remote is very similar.
This is what it looks like on my system.
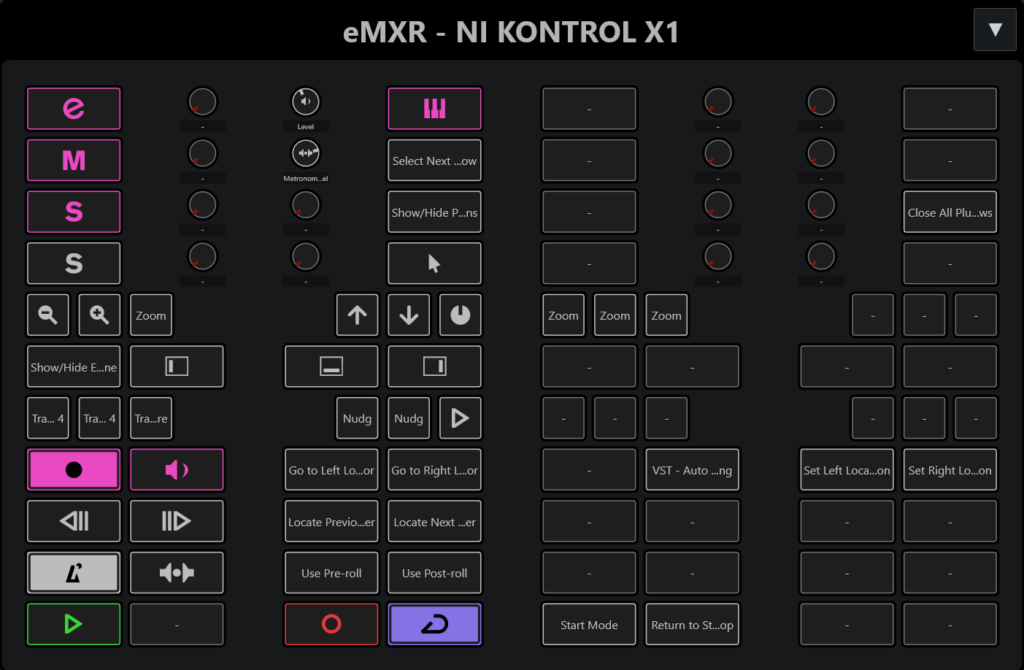
Note that the X1 MK1 surface is represented twice. The right half represents the SHIFT button being pressed on the hardware.
However I’ve also created a Cubase .midiremote file that matches my X1 template, and added it to the ZIP file in the Downloads section below. This file can be imported in the Cubase MIDI Remote.
Downloads
Native Instruments download page to configure the X1 MK1 or MK2: Native Instruments Controller Editor
My NI Controller Editor X1 MK1 template and matching Cubase .midiremote script